Friday, February 15, 2019

How to Pass Variables to View in Laravel

How to Pass Variables to View in Laravel

How to pass variables to view in Laravel? It’s quite easy.

1. with(‘xxx’, $xxx)

In controller:

$name    = "Tom";
$address = "XXX Rd.";
   :
Return view('name')->with('name', $name)->with('address', $address);

In view:

{{ $name }}

2. Pack all variables into an array

In controller:

$user = [
  $name    => "Tom";
  $address => "XXX Rd.";
]

return view('products.cart', $user);

In view:

{{ $name }}

3. compact

Using compact is a more concise and recommending way to do so.

In controller:

$cart  = session()->get('cart');
$total = 0;
   :
return view('products.cart', compact('cart', 'total')); 

In view:

{{ $cart }}
{{ $total }}

Monday, February 11, 2019

Create and Maintain Users with Artisan Tinker in Laravel

Create and Maintain Users with Artisan Tinker in Laravel

Now, it’s time to create a user to the database. Of course, using register form we have just created to create a user is a standard process. By the way, it’s good to have the functionality test to the register form.

However, there is a way to create user without register form. It utilizes the ‘artisan tinker’ commands to do so. It’s quite easy and can be done before we create the register form.

> php artisan tinker

When execute the command above, the Psy Shell shows and we can type the tinker commands to it.

Create a user

>>> $user = User::create(array('name' => 'Tad White', 
    'email' => 'tad@test.com', 
    'password' => Hash::make('xxxxxxxx')));
=> App\User {#2941
     name: "Tad White",
     email: "tad@test.com",
     updated_at: "2019-02-10 16:08:24",
     created_at: "2019-02-10 16:08:24",
     id: 1,
   }
>>>

or

>>> $user = new User;
=> App\User {#2938}
>>> $user->name = 'a';
=> "a"
>>> $user->email = 'a@test.com';
=> "a@test.com"
>>> $user->password = Hash::make('xxxxxxxx');
=> "$2y$10$E5ODjTvQefxCvMtm5S2xyuto9gqOtOJJRTNErUH9x6AtSnTPCPoki"
>>> $user->save();
=> true

Show all users

>>> User::all();
=> Illuminate\Database\Eloquent\Collection {#2943
     all: [
       App\User {#2940
         id: 1,
         name: "Tad White",
         email: "tad@test.com",
         email_verified_at: null,
         birthday: null,
         is_admin: 0,
         created_at: "2019-02-10 16:08:24",
         updated_at: "2019-02-10 16:08:24",
       },
       App\User {#2936
         id: 2,
         name: "a",
         email: "a@test.com",
         email_verified_at: null,
         birthday: null,
         is_admin: 0,
         created_at: "2019-02-10 16:14:02",
         updated_at: "2019-02-10 16:14:02",
       },
     ],
   }

Find the number of users

>>> User::count();
=> 2

Now, there are two users in the database.

Find a user

Let’s find the first user:

>>> User::find(1);
=> App\User {#2933
     id: 1,
     name: "Tad White",
     email: "tad@test.com",
     email_verified_at: null,
     birthday: null,
     is_admin: 0,
     created_at: "2019-02-10 16:08:24",
     updated_at: "2019-02-10 16:08:24",
   }

Or, we can do this to find the name includes ‘Tad’:

>>> User::where('name', 'like', '%Tad%')->get();
=> Illuminate\Database\Eloquent\Collection {#2913
     all: [
       App\User {#2944
         id: 1,
         name: "Tad White",
         email: "tad@test.com",
         email_verified_at: null,
         birthday: null,
         is_admin: 0,
         created_at: "2019-02-10 16:08:24",
         updated_at: "2019-02-10 16:08:24",
       },
     ],
   }
>>>

To find the name equal to ‘a’ and get all users:

>>> User::where('name', '=', 'a')->get();

or

>>> User::where('name', 'a')->get();

Using get() method to show all users from the query result set

To show the result set or collection that meets the condition, use 'get()' method:

>>> User::where('id', '>' , '2')->get();

Delete a user

> $user = User::find(1);
> $user->delete();

Create fake seed data

>>> factory(App\User::class, 10)->create();
=> Illuminate\Database\Eloquent\Collection {#2956
     all: [
       App\User {#2952
         name: "Abigail Fahey",
         email: "jaqueline.gusikowski@example.org",
         email_verified_at: Illuminate\Support\Carbon @1549816574 {#2951
           date: 2019-02-10 16:36:14.637540 UTC (+00:00),
         },
         updated_at: "2019-02-10 16:36:14",
         created_at: "2019-02-10 16:36:14",
         id: 3,
       },
       :

Sunday, February 10, 2019

Integrating The Default Authentication of Laravel with Current App

Integrating The Default Authentication of Laravel with Current App
The authentication is nearly necessary in every application. The Default Authentication in Laravel is simple to create yet powerful. It save a lot of time and effort of developers. It can be integrated into the current app with minor modifications.
Here are the key steps to do so:

1. Add two fields to users table

Let’s say there are table fields, ‘birthday’ and ‘is_admin’, need to be added to the table users. We can make a migration file first:
>php artisan make:migration add_fields_to_users_table --table=users
Created Migration: 2019_02_08_134603_add_fields_to_users_table
Secondly, we need to add codes to the migration file ‘2019_xx_xx_xxxxxx_add_fields_to_users_table.php’ under database/migrations directory.
public function up()
{
  Schema::table('users', function (Blueprint $table) {
  //
    $table->date('birthday')->nullable()->after('remember_token');
    $table->boolean('is_admin')->default(false)->after('birthday');
  });
}

public function down()
{
  Schema::table('users', function (Blueprint $table) {
  //
    $table->dropColumn('birthday');
    $table->dropColumn('is_admin');
  });
}
Thirdly, Execute php artisan migrate to add table fields to table users.
> php artisan migrate
Migrating: 2019_02_08_134603_add_fields_to_users_table
Migrated:  2019_02_08_134603_add_fields_to_users_table
Then we can make a commit to the git repository.
After executing php artisan make:auth and authentication file generation, a layout file has been generated:
resources/views/layouts/app.blade.php
This is the default layout page. It is shared by all Auth view file. We can find the code of ‘Login’ and ‘Register’ link in the file:
<!-- Authentication Links -->
@guest
  <li class="nav-item">
    <a class="nav-link" href="{{ route('login') }}">{{ __('Login') }}</a>
  </li>
  @if (Route::has('register'))
    <li class="nav-item">
      <a class="nav-link" href="{{ route('register') }}">{{ __('Register') }}</a>
    </li>
  @endif
@else
  <li class="nav-item dropdown">
    <a id="navbarDropdown" class="nav-link dropdown-toggle" href="#" role="button" data-toggle="dropdown" aria-haspopup="true" aria-expanded="false" v-pre>
      {{ Auth::user()->name }} <span class="caret"></span>
    </a>
    <div class="dropdown-menu dropdown-menu-right" aria-labelledby="navbarDropdown" 
      <a class="dropdown-item" href="{{ route('logout') }}" 
         onclick="event.preventDefault();document.getElementById('logout-form').submit();">
         {{ __('Logout') }}
      </a>
      <form id="logout-form" action="{{ route('logout') }}" method="POST" style="display: none;">
         @csrf
      </form>
    </div>
  </li>
@endguest
For the integration of all views ( current and Auth generated ), all we have to do is to:
  1. Copy the layout file we prefer to the directory resources/views/layouts/
  2. Rename it to app.blade.php. (rename original app.blade.php to other name first.)
  3. Insert the the code of ‘Login’ and ‘Register’ link above at the navbar position of the file.
  4. Update the @extends('layout') in all view file to @extends('layouts.app') to ensure all view files point to the same default layout file.
  5. The Auth view files are no need to changed.
enter image description here

3. Edit attributes of Model User

There are attributes ('birthday' and 'is_admin') of model User need to be added in app/User.php.
protected $fillable = [
   'name', 'email', 'password', 'birthday', 'is_admin'];

4. Modification of controller

For the controller, we need to add attributes 'birthday' and 'is_admin' to the file
App/Http/Controllers/Auth/RegisterController.php
protected function validator(array $data)
{
  return Validator::make($data, [
    'name' => ['required', 'string', 'max:255'],
    'email' => ['required', 'string', 'email', 'max:255', 'unique:users'],
    'password' => ['required', 'string', 'min:6', 'confirmed'],
    'birthday' => ['date','nullable'],
    'is_admin' => ['boolean'],
    ]);
}

protected function create(array $data)
{
  $is_admin = array_key_exists('is_admin', $data) ? true : false;
  return User::create([
    'name' => $data['name'],
    'email' => $data['email'],
    'password' => Hash::make($data['password']),
    'birthday' => $data['birthday'],
    'is_admin' => $is_admin',
  ]);
}

5. Add the fields to the view file

Now, 'birthday'and 'is_admin' have to be added to the user register page at resources/views/auth/register.blade.php
For 'birthday':
<div class="form-group row">
  <label for="birthday" class="col-md-4 col-form-label text-md-right">{{ __('Birthday') }}</label>
  <div class="col-md-6">
    <input id="birthday" type="date" class="form-control{{ $errors->has('birthday') ? ' is-invalid' : '' }}" 
      name="birthday" value="{{ old('birthday') }}">
    
    @if ($errors->has('birthday'))
      <span class="invalid-feedback" role="alert">
        <strong>{{ $errors->first('birthday') }}</strong>
      </span>
    @endif
  </div>
</div>
For ‘is_admin’:
<div class="form-group row">
  <label for="is_admin" class="col-md-4 col-form-label text-md-right">{{ __('Administrator?') } </label>
  <div class="col-md-6">
    <input id="is_admin" type="checkbox" class="
form-control{{ $errors->has('is_admin') ? ' 
is-invalid' : '' }}" name="is_admin" value="1">
    @if ($errors->has('is_admin'))
      <span class="invalid-feedback" role="alert">
        <strong>{{ $errors->first('is_admin') }}</
strong>
      </span>
    @endif
  </div>  
</div>
The register form is similar like:
enter image description here

6. Note: Checkbox Behavior

Unlike other input controls, a checkbox value is only included in the submitted data if the checkbox is currently checked. If it is, then the value of the checkbox’s valueattribute is reported as the input’s value.
If the checkbox is unchecked, both the key and value of the checkbox are NOT submitted. It submits nothing.
Therefore, the value of the checkbox ‘is_admin’ is set to ‘1’ for representing ‘true’ boolean value. It will be validated by the validator of RegisterController when submitted.
'is_admin'  =>  ['boolean']
Then in the create function of the RegisterController, the 'is_admin' key is checked whether it exists in the array $data . If does, it means the 'is_admin' is true, otherwise false.
$is_admin = array_key_exists('is_admin', $data) ? true : false;
return User::create([
    'name' => $data['name'],
    'email' => $data['email'],
    'password' => Hash::make($data['password']),
    'birthday' => $data['birthday'],
    'is_admin' => $is_admin',

Thursday, February 7, 2019

Keep Various Versions of Apps with 'Git Branch'

Keep Various Versions of Apps with 'Git Branch'

For some reasons, we need to keep different versions of the same app in the git repository. For example, a new function such as user authentication is added and the old version must be kept in the same time for future reference.

A git command ‘git branch’ can be used to satisfy the need. The default branch of the repository is master, we can create a new branch to preserve the original version (i.e. 01_basic). Then we can keep on developing new function in the master branch.

Create a new branch to preserve the original version.

List all branch name:

> git branch 
* master

Create a new branch ‘01_basic’:

> git branch 01_basic
> git branch
  01_basic
* master 

If we need to switch to the 01_basic branch, just:

> git checkout 01_basic
> git branch
* 01_basic
  master

*: the current branch

Other git operations:

> git branch -m 01_basic basic  // rename branch
> git branch -d 01_basic        // delete branch
> git checkout -b 02  // create and switch to branch 02    

Push all branches to the remote repository (i.e. github.com)

After several modifications of code in the ‘master’ branch, branch ‘01_basic’ and branch ‘master’ have had two different codebases. What if we need to push all branches to the remote repository (i.e. github.com)?

We can do it as:

> git push origin --all
Username for 'https://github.com': chaoyee
Password for 'https://chaoyee@github.com':
   :
To https://github.com/chaoyee/laravel_product.git
   151c1b9..5618f74  master -> master
 * [new branch]      01_basic -> 01_basic

The two branches shown on the webpage of github.com

branch on github.com

Wednesday, January 30, 2019

What Changes Have Been Made While Implementing Laravel Authentication

What Changes Have Been Made While Implementing Laravel Authentication

Implementation of Laravel authentication is very simple. All you need is to execute
php artisan make:auth, then it generates the authentication functions already.

However, I would like to know what changes have been made in order to modify it and to fit into my own code. There is a way to do so: git version control.

All I have to do is to commit everything before making authentication and show the difference after. It will show the changes have been made.

Let’s start a Laravel project called “Laravel_test”.

Start the test project

> laravel new laravel_test
      :
      :
> cd laravel_test

Start git control

  git init
  git add .
  git commit -m "Initial Commit"

Make Authentication

Now execute the make:auth command.

> php artisan make:auth
Authentication scaffolding generated successfully.

Show the files changed and added:

> git status
On branch master
Changes not staged for commit:
  (use "git add <file>..." to update what will be committed)
  (use "git checkout -- <file>..." to discard changes in working directory)

	modified:   routes/web.php

Untracked files:
  (use "git add <file>..." to include in what will be committed)

	app/Http/Controllers/HomeController.php
	resources/views/auth/
	resources/views/home.blade.php
	resources/views/layouts/
  • File changed: routes/web.php
  Auth::routes();
  Route::get('/home', 'HomeController@index')->name('home');
  • Files added:
  1. app/Http/Controllers/HomeController.php
<?php
namespace App\Http\Controllers;
use Illuminate\Http\Request;

class HomeController extends Controller
{
    /**
     * Create a new controller instance.
     *
     * @return void
     */
    public function __construct()
    {
        $this->middleware('auth');
    }

    /**
     * Show the application dashboard.
     *
     * @return \Illuminate\Contracts\Support\Renderable
     */
    public function index()
    {
        return view('home');
    }
}
  1. resources/views/auth/

    resources/views/auth/passwords/email.blade.php
    resources/views/auth/passwords/reset.blade.php
    resources/views/auth/login.blade.php
    resources/views/auth/register.blade.php
    resources/views/auth/verify.blade.php

  2. resources/views/layouts/app.blade.php

  3. resources/views/home.blade.php

Remove the Laravel authentication

The changes havn’t been commited yet at this stage. If we need to go back to the original status (before make:auth), just run the git command:

  1. Revert changes to modified files.
> git reset --hard
HEAD is now at 096f938 Add README.txt

The routes/web.php has been changed to the original status.

  1. Remove all untracked files and directories.
    (-f is force, -d is remove directories)
> git clean -fd 
Removing app/Http/Controllers/HomeController.php
Removing resources/views/auth/
Removing resources/views/home.blade.php
Removing resources/views/layouts/

Wednesday, January 9, 2019

How to Add Constants in Larvel 5

How to Add Constants in Larvel 5

If it needs to add constants in order to be used everywhere in the app, just follows the steps below:

1. Create a file constants.php inside config directory and put your settings in an array:

file : config/constants.php

<?php
  return [
    'PAGINATION' => 5
  ];
?>

2. Then you can get the value by using ‘config helper’ anywhere in your controllers or views in Laravel 5:

echo config('constants.PAGINATION');
//output-> 5

Friday, January 4, 2019

Adding Search Field for The CRUD Web App in Laravel

Adding Search Field for The CRUD Web App in Laravel

Search Box

A search field is a useful function for users to find the information they need. To make a search field toward a web app in Laravel, their are few steps to go:

1. Make a route to the search function.

Firstly, we need to add a route to the search function in the route file (routes/web.php).

Route::post('/products/search', 'ProductController@search')->name('products.search');

This means the URI is /products/search with http method ‘post’ and route the request to the ‘search’ method in the ‘Product’ controller. The route name is ‘products.search’.

2. Make the search method in the controller.

The ‘search’ method in the ‘Product’ controller should be looked like this:

  • Single keyword
    If we have only one keyword, it is much simpler to deal with than the multiple one situation.
public function search(Request $request)
{
  $request->validate([
    'keyword' => 'required'
  ]);
  $keyword = $request->get('keyword');
  //single keyword search - start
  $products = Product::where('prod_name', 'like', '%'.$keyword.'%')
    orWhere('prod_desc', 'like', '%'.$keyword.'%')->get();
  $products = Product::paginate(5); 
  // single keyword search - end
  return view('products.index', compact('products'));      
}
  • Multiple keywords
    What if we have more than one keywords? If so we need to change the ‘single keyword search’ of the code to the following:
  $keywords = explode(' ', $request->get('keyword'));
  $where = '';
  foreach ($keywords as $id => $word) {
    if ($id <> 0) 
      $where = $where.'or ';
    }
  $where = $where."prod_name like '%{$word}%' or prod_desc like '%{$word}%'";  
  }
  $sql = "$where ORDER BY 'prod_id' DESC";
  $products = Product::whereRaw($sql)->get();

3. Make a search field in the menu bar of the index view file.

Lastly, we need to add the following code to the index file in order to show the search box in the main menu bar. The file is
resources/views/products/layout.blade.php in this example.

 <form method="post" action="{{ route('products.search') }}" class="form-inline my-2 my-lg-0">
   @csrf
   <input class="form-control mr-sm-2" type="text" placeholder="Search" 
     aria-label="Search" name="keyword">
   <button class="btn btn-outline-success my-2 my-sm-0" type="submit">Search</button>
</form>

As usual, a submit form tag is added with http post method. The action to {{ route('products.search' }} is the blade template function to route to the route named ‘products.search’.

Tuesday, January 1, 2019

Seeding Database in Laravel

Seeding Database in Laravel

How to seed the database in Laravel? If we wish to use real data for the seeding, just edit the array $arrayOfSeed in database/seedsDatabaseSeeder.php and put the real data in it.

database/seeds/DatabaseSeeder.php

<?php

use Illuminate\Database\Seeder;

class DatabaseSeeder extends Seeder
{
    /**
     * Seed the application's database.
     *
     * @return void
     */
    public function run()
    {
        // $this->call(UsersTableSeeder::class);
    	  // 
    $arrayOfSeed = [
      ['id' => 1, 'prod_name' => 'A1000', 'prod_desc' => '26\"x21\" MTB Orange', 'prod_price' => 12000 , 'prod_qty' => 22],  
      ['id' => 2, 'prod_name' => 'A1100', 'prod_desc' => '26\"x19\" MTB Silver', 'prod_price' => 12300 , 'prod_qty' => 21],
      ['id' => 3, 'prod_name' => 'A1200', 'prod_desc' => '26\"x17\" MTB Black', 'prod_price' => 13000 , 'prod_qty' => 5],
      ['id' => 4, 'prod_name' => 'A1300', 'prod_desc' => '26\"x22\" MTB Red', 'prod_price' => 12300 , 'prod_qty' => 8],
      ['id' => 5, 'prod_name' => 'A1400', 'prod_desc' => '26\"x23\" MTB Blue/White', 'prod_price' => 13000 , 'prod_qty' => 6],
      ['id' => 6, 'prod_name' => 'A1500', 'prod_desc' => '26\"x23\" MTB Purple/White', 'prod_price' => 13000 , 'prod_qty' => 12],
      ['id' => 7, 'prod_name' => 'A1600', 'prod_desc' => '26\"x23\" MTB Black/White', 'prod_price' => 13000 , 'prod_qty' => 8],
      ['id' => 8, 'prod_name' => 'A1700', 'prod_desc' => '26\"x23\" MTB Gray/Black', 'prod_price' => 13000 , 'prod_qty' => 4],
      ['id' => 9, 'prod_name' => 'A1800', 'prod_desc' => '26\"x24\" MTB Yellow', 'prod_price' => 13000 , 'prod_qty' => 5],
      ['id' => 10, 'prod_name' => 'A1900', 'prod_desc' => '26\"x24\" MTB Black', 'prod_price' => 13000 , 'prod_qty' => 12],
      ['id' => 11, 'prod_name' => 'A2000', 'prod_desc' => '26\"x21\" MTB lady Orange', 'prod_price' => 12000 , 'prod_qty' => 10],
      ['id' => 12, 'prod_name' => 'A2100', 'prod_desc' => '26\"x19\" MTB lady Silver', 'prod_price' => 12300 , 'prod_qty' => 11]  
    ];
    DB::table('products')->insert($arrayOfSeed);
    }
}

After preparing the DatabaseSeeder.php, run the seeding commend:

$> php artisan db:seed

Done!

Monday, December 31, 2018

How to Hide Pagination Link While Not Using Paginate() Method in Laravel

How to Hide Pagination Link While Not Using Paginate() Method in Laravel

Pagination in Laravel is so easy and powerful. Yet there is a problem that cause an error.

Considering a situation that two methods send result sets to the same view file, one is generated by the paginate() method and one isn’t. However, the pagination links() results in an error while the result set is not generated from the paginate() method. How to solve this issue? If we can test whether the result set is generated from the paginate() method in the controller, the problem can be solved.

controller: ProductsController.php

class ProductController extends Controller
{
public function index()
  {
    $products = Product::paginate(5);
    return view('products.index', compact('products'));
  }

public function search(Request $request)
  {
    $request->validate([
      'keyword' => 'required'
    ]);
    $keyword = $request->get('keyword'); 
    $products = Product::where('prod_name', 'like', '%'.$keyword.'%')
      ->orWhere('prod_desc', 'like', '%'.$keyword.'%')->get();
    return view('products.index', compact('products'));
  }
}

view: index.blade.php (before)

    :
<div class="pagination justify-content-center">
  {{ $products->links() }}
</div> 
    :

If the result set is an instance of the class \Illuminate\Pagination\LengthAwarePaginator, then we can make sure that the result set is generated from the method paginate(). Therefor, a pagination link method is required in the view file. On the other hand, if the result set is not the instance of the class mentioned before, then the pagination link should be hidden. Thus, an if() statement is added to the view file as follows:

index.blade.php (after)

@if ($products instanceof \Illuminate\Pagination\LengthAwarePaginator)
  <div class="pagination justify-content-center">
	  {{ $products->links() }}
  </div> 
@endif

It solves the problem!

Sunday, December 30, 2018

Set the Current Timestamp as the Default Value of A Timestamp Column in A Table with Laravel Migrations

Set the Current Timestamp as the Default Value of A Timestamp Column in A Table with Laravel Migrations

How to Set the current timestamp as the default value of a timestamp column in a table with Laravel migrations? Let’s find out:

SQL Statement

Use DEFAULT CURRENT_TIMESTAMP.

CREATE TABLE `products` (
         :
  `created_at` timestamp NULL DEFAULT CURRENT_TIMESTAMP,
  `updated_at` timestamp NULL DEFAULT CURRENT_TIMESTAMP,
         :
) 

Laravel Migrations

Just use a raw expression, DB::raw() to set CURRENT_TIMESTAMP as a default value for a column:

$table->timestamp('created_at')
      ->default(DB::raw('CURRENT_TIMESTAMP'));

This works for every database driver.

Saturday, December 29, 2018

A Simple Laravel CRUD App

A Simple Laravel CRUD App

A Laravel CRUD Sample

Laravel is an excellent PHP framework for web development. It creates a RESTful web app with just a few commands. The procedures are shown as the following steps:

1. Create a New Project

$> laravel new laravel_product
Crafting application...
Loading composer repositories with package information
Installing dependencies (including require-dev) from lock file
Package operations: 86 installs, 0 updates, 0 removals
  - Installing doctrine/inflector (v1.3.0): Loading from cache
  - Installing doctrine/lexer (v1.0.1): Loading from cache
  - Installing dragonmantank/cron-expression (v2.2.0): 
                    :
                    :
Package manifest generated successfully.
Application ready! Build something amazing.

After creating a new project named 'laravel_product', the files needed have been created under the directory.

$> cd laravel_product
$> php artisan -v
Laravel Framework 5.7.19

2: Configure MySQL Database

Edit .env file

DB_CONNECTION=mysql
DB_HOST=127.0.0.1
DB_PORT=3306
DB_DATABASE=laravel_product
DB_USERNAME=xxxx
DB_PASSWORD=xxxx

Add a database in MySQL server

Add a database manually by using Sequel Pro and following parameters.

  • Database Name: laravel_product
  • Database Encoding: UTF-8 Unicode (utf8mb4)
  • Database Collation: Default (utf8mb4_general_ci)

Create database

Create tables

$> php artisan migrate
Migration table created successfully.
Migrating: 2014_10_12_000000_create_users_table
Migrated:  2014_10_12_000000_create_users_table
Migrating: 2014_10_12_100000_create_password_resets_table
Migrated:  2014_10_12_100000_create_password_resets_table

3: Create a Model 'Product' and a Migration File.

$> php artisan make:model Product -m
Model created successfully.
Created Migration: 2018_12_26_181923_create_products_table

Edit migration file 2018_12_26_181923_create_products_table.php

Insert fields between id and timestamps:

  $table->increments('id');
    :
  $table->string('prod_name');
  $table->text('prod_desc');
  $table->integer('prod_price');
  $table->integer('prod_qty'); 
    :
  $table->timestamps();

Create table 'products'

$> php artisan migrate
Migrating: 2018_12_26_181923_create_products_table
Migrated:  2018_12_26_181923_create_products_table

Add the fillable property inside Product.php file.

<?php
  namespace App;
  use Illuminate\Database\Eloquent\Model;

  class Product extends Model {
      protected $fillable = [
        'prod_name',
        'prod_desc',
        'prod_price',
        'prod_qty'
      ];
  }

4: Create Routes and Controller

Create ProductController.php

Use following command to create controller.

  • php artisan make:controller
$> php artisan make:controller ProductController --resource
Controller created successfully.

Add routes code in /routes/web.php file.

Route::resource('products', 'ProductController');

Show routes

$> php artisan route:list
+-----------+-------------------------+------------------+-----------+
| Method    | URI                     | Name             | Action    |
+-----------+-------------------------+------------------+-----------+
| GET|HEAD  | /                       |                  | Closure   |
| GET|HEAD  | api/user                |                  | Closure   |
| GET|HEAD  | products                | products.index   | *@index   |
| POST      | products                | products.store   | *@store   |
| GET|HEAD  | products/create         | products.create  | *@create  |
| GET|HEAD  | products/{product}      | products.show    | *@show    |
| PUT|PATCH | products/{product}      | products.update  | *@update  |
| DELETE    | products/{product}      | products.destroy | *@destroy |
| GET|HEAD  | products/{product}/edit | products.edit    | *@edit    |
+-----------+-------------------------+------------------+-----------+
* = App\Http\Controllers\ProductController

5: Create the views

a. Create a file layout.blade.php inside '/resources/views' folder.

b. Create a folder 'products' inside '/resources/views' folder.

c. Then, create the following three files inside '/resource/view/products'.

  • create.blade.php
  • edit.blade.php
  • index.blade.php

d. Edit layout.blade.php

<!DOCTYPE html>
<html lang='en'>
<head>
 <meta charset="utf-8">
 <meta name="viewport" content="width=device-width, initial-scale=1.0">
 <meta http-equiv="X-UA-Compatiable" content="ie=edge">
 <title>Laravel 5.7 A simple CRUD Example</title>
    <link href="{{ asset('css/app.css') }}" rel="stylesheet" type="text/css">
</head>
<body>
 <!-- Navbar start -->
  <nav class="navbar navbar-expand-md navbar-dark bg-dark fixed-top">
    <a class="navbar-brand" href="{{ route('products.index') }}">
    A Laravel CRUD Sample</a>
    <button class="navbar-toggler" type="button" data-toggle="collapse" 
      data-target="#navbarsExampleDefault" aria-controls="navbarsExampleDefault" 
      aria-expanded="false" aria-label="Toggle navigation">
      <span class="navbar-toggler-icon"></span>
    </button>
    <div class="collapse navbar-collapse" id="navbarsExampleDefault">
      <ul class="navbar-nav mr-auto">
        <li class="nav-item active">
          <a class="nav-link" href="{{ route('products.create') }}">
            Add A Product 
            <span class="sr-only">(current)</span></a>
        </li>
      </ul>
      <form method="post" action="#" class="form-inline my-2 my-lg-0">
        <input class="form-control mr-sm-2" type="text" placeholder="Search" 
          aria-label="Search">
        <button class="btn btn-outline-success my-2 my-sm-0" 
          type="submit">Search</button>
      </form>
    </div>
  </nav> 
  <!-- Navbar end -->
 <div class="container">
  @yield('content')
 </div>
 <script src="{{ asset('js/app.js') }}"></script>
</body>
</html>

e. Edit create.blade.php

Remember to add @csrf in the tag in order to have CSRF Protection.

<form method="post" action="{{ route('products.store') }}"> 
  @csrf  // must added.
     :
</form>

create.blade.php is as follows:

@extends('layout')

@section('content')
<div class="card uper">
 <div class="card-header">
  <h4>Add Product</h4>
 </div>
 <div class="card-body">
   @if ($errors->any())
  <div class="alert alert-danger">
    <ul>
      @foreach ($errors->all() as $error)
     <li>{{ $error }}</li>
     <button type="button" class="close" data-dismiss="alert" 
       aria-label="Close">
       <span aria-hidden="true">&times;</span>
              </button>
   @endforeach 
    </ul>
    </div><br/>
  @endif
  <form method="post" action="{{ route('products.store') }}">
    @csrf
    <div class="form-group">
      <label for="prod_name">Product Name:</label>
            <input type="text" class="form-control" name="prod_name"/>
    </div>
    <div class="form-group">
      <label for="prod_desc">Product Description:</label>
            <input type="text" class="form-control" name="prod_desc"/>
    </div>
          <div class="form-group">
      <label for="prod_price">Product Price:</label>
      <input type="text" class="form-control" name="prod_price"/>
    </div>
    <div class="form-group">
      <label for="prod_qty">Product Quantity:</label>
   <input type="text" class="form-control" name="prod_qty"/>
    </div>
    <button type="submit" class="btn btn-primary">Add</button>
    <a href="{{ route('products.index') }}" class="btn btn-info">Back</a>
   </form>
    </div>
  </div>
@endsection

f. Code 'create' function in ProductController.php

Remember to add use App\Product; in the controller in order to use the Model 'Product'.

<?php
  namespace App\Http\Controllers;
  use Illuminate\Http\Request;
  use App\Product;  // must add

  public function create() 
    {
      return view('shares.create');
    }

6: Save Data

Code the "store" function in the ProductController.php

public function store(Request $request)
  {
    $request->validate([
      'prod_name'  => 'required',
      'prod_desc'  => 'required',
      'prod_price' => 'required|integer',
      'prod_qty'   => 'required|integer'
    ]);
    $product = new Product([
      'prod_name'  => $request->get('prod_name'),
      'prod_desc'  => $request->get('prod_desc'),
      'prod_price' => $request->get('prod_price'),
      'prod_qty'   => $request->get('prod_qty')
    ]);
    $product->save();
    return redirect('/products')->with('success','Product has been added!');
  }

Add some testing data and save.

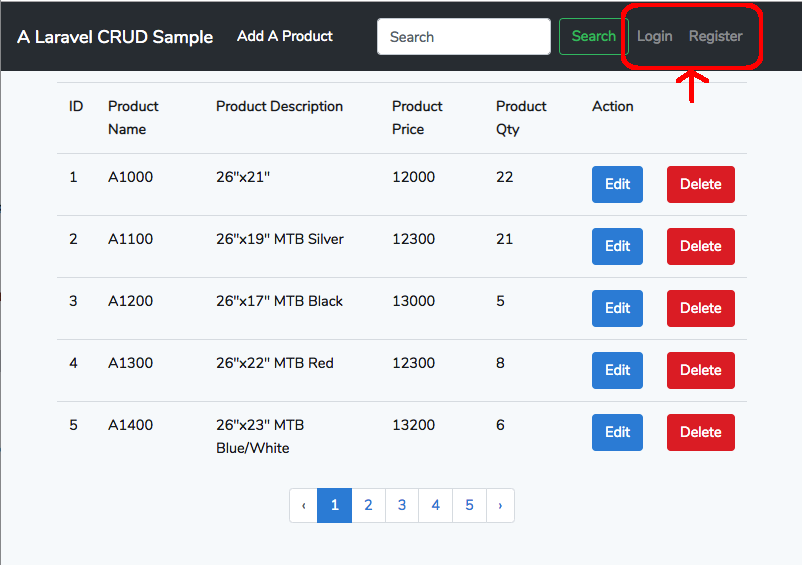
7: Display the data.

Code index.blade.php

@extends('layout')

@section('content')
<div class="uper">
 @if(session()->get('success'))
  <div class="alert alert-success">
    {{ session()->get('success') }}
    <button type="button" class="close" data-dismiss="alert" aria-label="Close">
   <span aria-hidden="true">&times;</span>
          </button>
   </div><br/>
 @endif
</div>
<table class="table table-hover">
  <thead> 
 <tr>
  <td><b>ID</b></td>
  <td><b>Product Name</b></td>
  <td><b>Product Description</b></td>
  <td><b>Product Price</b></td>
  <td><b>Product Qty</b></td>
  <td colspan="2"><b>Action</b></td>
 </tr>
  </thead>
  <tbody>
   @foreach($products as $product)
   <tr>
     <td>{{$product->id}}</td>
     <td>{{$product->prod_name}}</td>
     <td>{{$product->prod_desc}}</td>
     <td>{{$product->prod_price}}</td>
     <td>{{$product->prod_qty}}</td>
     <td><a href="{{ route('products.edit', $product->id) }}" 
    class="btn btn-primary">Edit</a></td>
     <td>
        <form method="post" action="{{ route('products.destroy', $product->id) }}">
          @method('DELETE')
          @csrf
          <button type="submit" class="btn btn-danger">Delete</button>
        </form>
      </td>
   </tr>
   @endforeach
  </tbody>
</table>
<div class="pagination justify-content-center">
 {{ $products->links() }}
</div>
@endsection

Code the "index" function in the ProductController.php

public function index() 
  {
    $products = Product::all();
    return view('products.index', compact('products'));
  }

8: Edit and Update Data

Code the "edit" function in the ProductController.php

public function edit($id) 
  {
    $product = Product::find($id);
    return view('products.edit', compact('product'));
  }

Code "edit.blade.php"

@extends('layout')

@section('content')
<div class="card uper">
  <div class="card-header">
   <h4>Edit Product</h4>
  </div>
  <div class="card-body">
   @if ($errors->any())
     <div class="alert alert-danger">
      <ul>
        @foreach ($errors->all() as $error)
          <li>{{ $error }}</li>
          <button type="button" class="close" data-dismiss="alert" 
            aria-label="Close">
     <span aria-hidden="true">&times;</span>
            </button>
        @endforeach
      </ul>
     </div><br/>
   @endif 
   <form method="post" action="{{ route('products.update', $product->id) }}">
     @method('PATCH')
     @csrf
     <div class="form-group">
      <label for="prod_name">Product Name</label>
      <input type="text" class="form-control" name="prod_name" 
        value={{ $product->prod_name }} /> 
     </div>
     <div class="form-group">
      <label for="prod_desc">Product Description</label>
      <input type="text" class="form-control" name="prod_desc" 
        value={{ $product->prod_desc }} /> 
     </div>
     <div class="form-group">
      <label for="prod_price">Product Price</label>
      <input type="text" class="form-control" name="prod_price" 
        value={{ $product->prod_price }} /> 
     </div>
     <div class="form-group">
      <label for="prod_qty">Product Qty</label>
    <input type="text" class="form-control" name="prod_qty" 
      value={{ $product->prod_qty }} /> 
   </div>
   <button type="submit" class="btn btn-primary">Update</button>
    </form>
  </div>
</div>
@endsection

Code the "update" function in the ProductController.php

public function update(Request $request, $id)
  {
    $request->validate([
      'prod_name'  => 'required',
      'prod_desc'  => 'required',
      'prod_price' => 'required|integer',
      'prod_qty'   => 'required|integer'
    ]);
    $product = Product::find($id);
    $product->prod_name  = $request->get('prod_name');
    $product->prod_desc  = $request->get('prod_desc');
    $product->prod_price = $request->get('prod_price');
    $product->prod_qty   = $request->get('prod_qty');
    $product->save();
    return redirect('/products')->with('success', 'Product has been updated!');
  }

9: Delete the data

Code the "delete" function in ProductController.php

public function destroy($id)
  {
    $product = Product::find($id);
    $product->delete();
    return redirect('/products')->with('success', 'Product has been deleted!');
  }

10: Start the CRUD web app.

Start the server:

$> php artisan serve

Go to "http://localhost:8000/products" and will see the product index page.

11: Pagination

If it needs to have the pagination functionality, it's just as easy as doing two things.

Modify the 'index' function in ProductController.php.

a. change to pagination method.

Just change

$products = Product::all();

to:

// number: the record number per page.
$products = Product::paginate(number);  

Pagination links:

  • $products->links()
     :
    </table>
  <div class="pagination justify-content-center">
    {{ $products->links() }}
  </div>
@endsection

That's all! Isn't it simple and easy!