Monday, February 25, 2019

Customization of Blade Directive in Laravel 5.7

Customization of Blade Directive in Laravel 5.7

There is a convenient feature for coding blade templates in Laravel’s view file. It is called ‘directive’. For example, @if and @endif.

What if I need a customized directive? How do I do that?

In my case, I have a long statement in the view file to test if the user is a administrator? I use @if to to do so in the first place. However, it requires the same function in many places and is little annoying to type many words. So I use custom directive to solve this problem and make the code looks more concise.

@if(auth()->check() && auth()->user()->isAdmin())
  <div>
    :
  </div>
@endif

Customization blade statement

Simple steps:

Just put the code in the boot() function of the AppServiceProvider.php. That’s it!

  • app/Providers/AppServiceProvider.php
    (use if statement (laravel >= 5.5))
public function boot() {
  \Blade::if('isAdmin', function() {
     return auth()->check() && auth()->user()->isAdmin();
  });
}

Now, it looks more intuitive and concise!

@isAdmin
  <div>
    :
  </div>
@endisAdmin

Add Change Password Functionality to The Basic Authentication in Laravel 5.7

Add Change Password Functionality to The Basic Authentication in Laravel 5.7

Laravel is an excellent PHP framework with many superb features which ease developers’ burden. For example, the built-in authentication alleviates developers’ trouble of making user authentication from the ground up, which is almost a necessity of many web sites.

Only one command to equip the basic authentication:

$ php artisan make:auth

The functionality includes new user registration, user login and reset password.

However, there is one important feature missing: change password.

This article explains the steps to implement the “change password” functionality after the implementation of Laravel basic authentication. It is based on Laravel 5.7.

Few parts added

Adding new functionality concerns as follows:

  • model (has created!)
  • route
  • controller
  • view

In this case, model User has been created. We just take care of the remaining three parts:

route

Firstly, we follow the naming convention and put the ‘password’ prefix before the name of the routes ‘change’.

routes/web.php

Route::get('password/change','Auth\ChangePasswordController@showChangeForm');
Route::post('password/change','Auth\ChangePasswordController@change')->name('password.change');

controller

The controller named as ‘ChangePasswordController’ under the namespace ‘Auth’ is also follows the naming convention of Laravel authentication. Using artisan command to generate the controller we need.

$ php artisan make:controller Auth/ChangePasswordController

app/Http/Controllers/Auth/ChangePasswordController.php

<?php

namespace App\Http\Controllers\Auth;

use Illuminate\Http\Request;
use App\Http\Controllers\Controller;

class ChangePasswordController extends Controller
{
  public function __construct() {
    $this->middleware('auth');
  }
}

As you can see, the first function we implement in the controller is the __construct() function. It states the user must be an authenticated user who is qualified to change password.

Two more functions are added as follows:

public function showChangeForm()
public function change()

The showChangeForm() function just shows a form to change password, while the change() function does the changing password job.

public function showChangeForm() {
  return view('auth.passwords.change');
}

Note that auth.passwords.change is due to the password related operations are under the directory ‘auth/passwords’.

Here shows the code for the controller as below:

  • app/Http/Controllers/Auth/ChangePasswordController.php
<?php
namespace App\Http\Controllers\Auth;

use App\User;
use App\Http\Controllers\Controller;
use Illuminate\Support\Facades\Auth;
use Illuminate\Support\Facades\Hash;
use Illuminate\Http\Request;

class ChangePasswordController extends Controller
{
  public function __construct() {
    $this->middleware('auth');
  }

  public function showChangeForm() {
    return view('auth.passwords.change');   
  }
  
  public function change(Request $request) {
    $current_password = $request->get('current_password');
    $new_password     = $request->get('new_password');
    
    // User authentication check
    if (Hash::check($current_password, Auth::user()->password)) {
      // Current and new password are the same, meaning user does not change password.
      if (strcmp($current_password, $new_password) != 0) { 
        $request->validate([
          'current_password' => 'required',
          'new_password'     => 'required|string|min:6|confirmed',
        ]); 

        // Change password
        $user = Auth::user();
        $user->password = Hash::make($new_password);
        $user->save();
        return redirect('/')->with('message', ['success', 'Password has been updated!']); 
      } else {
        return redirect()->back()->with('message', ['danger', 'New and current password are the same!']);
      }
    } else {
      return redirect()->back()->with('message', ['danger', 'Password incorrect!']);
    }
  }
}

view

Now, we copy and modify from login.blade.php then create a view file change.blade.php under the directory 'resources/views/auth/passwords`.

  • resources/views/auth/passwords/change.blade.php
@extends('layouts.app')

@section('content')
<div class="container">
  <div class="row justify-content-center">
    <div class="col-md-8">
      <div class="card">
        <div class="card-header">{{ __('Change Password') }}</div>
        <div class="card-body">
          <form method="POST" action="{{ route('password.change') }}">
            @csrf
            <div class="form-group row">
              <label for="current_password" class="col-md-4 col-form-label text-md-right">
                {{ __('Current Password') }}
              </label>
              <div class="col-md-6">
                <input id="current_password" type="password" 
                  class="form-control{{ $errors->has('current_password') ? ' is-invalid' : '' }}" 
                  name="current_password" value="{{ old('current_password') }}" required autofocus>
                @if ($errors->has('current_password'))
                  <span class="invalid-feedback" role="alert">
                    <strong>{{ $errors->first('current_password') }}</strong>
                  </span>
                @endif
              </div>
            </div>
            <div class="form-group row">
              <label for="new_password" class="col-md-4 col-form-label text-md-right">
                {{ __('New Password') }}
              </label>
              <div class="col-md-6">
                <input id="new_password" type="password" 
                  class="form-control{{ $errors->has('new_password') ? ' is-invalid' : '' }}" 
                  name="new_password" required>
                @if ($errors->has('new_password'))
                  <span class="invalid-feedback" role="alert">
                    <strong>{{ $errors->first('new_password') }}</strong>
                  </span>
                @endif
              </div>
            </div>
            <div class="form-group row">
              <label for="new_password_confirmation" class="col-md-4 col-form-label text-md-right">
                {{ __('Confirm New Password') }}
              </label>
              <div class="col-md-6">
                <input id="new_password_confirmation" type="password" 
                  class="form-control{{ $errors->has('new_password_confirmation') ? ' is-invalid' : '' }}" 
                  name="new_password_confirmation" required>
                @if ($errors->has('new_password_confirmation'))
                  <span class="invalid-feedback" role="alert">
                    <strong>{{ $errors->first('new_password_confirmation') }}</strong>
                  </span>
                @endif
              </div>
            </div>
            <div class="form-group row mb-0">
              <div class="col-md-8 offset-md-4">
                <button type="submit" class="btn btn-primary">
                  {{ __('Change Password') }}
                </button>
              </div>
            </div>
          </form>
        </div>
      </div>
    </div>
  </div>
</div>
@endsection

Change Password

Note

'new_password' => 'required|string|min:6|confirmed',

Note that in Laravel validation, when ‘confirmed’ validation is activated, the name of the confirmed field must be ‘xxx_confirmation’. For example, the name of the password field is ‘password’, then the name of the confirmed password field has to be ‘password_confirmation’. That is the rule to enable the confirmed validation.

Friday, February 22, 2019

A Better Message Bar for Laravel

A Better Message Bar for Laravel

Showing a message bar is very common task in writing PHP apps. In Laravel, there is even a built-in command ‘with’ to show a message bar with easy!

For example:

return redirect('/')->with('success', 'It works!');

Message_Bar_success
However, this message bar shows green color only, which utilize class="alert alert-success" with Bootstrap 4 Alerts.

Multiple types of alerts

There are eight types of alerts with different colors which can be classified as different usage. For example, the message with green color means a successful operation, while the one with red color often suggests a dangerous or fail situation.

Bootstrap_4_Alerts

<div class="alert alert-primary" role="alert">
  This is a primary alert—check it out!
</div>
<div class="alert alert-secondary" role="alert">
  This is a secondary alert—check it out!
</div>
<div class="alert alert-success" role="alert">
  This is a success alert—check it out!
</div>
<div class="alert alert-danger" role="alert">
  This is a danger alert—check it out!
</div>
<div class="alert alert-warning" role="alert">
  This is a warning alert—check it out!
</div>
<div class="alert alert-info" role="alert">
  This is a info alert—check it out!
</div>
<div class="alert alert-light" role="alert">
  This is a light alert—check it out!
</div>
<div class="alert alert-dark" role="alert">
  This is a dark alert—check it out!
</div>

The code

Let’s modify the code of message bar in order to show different types of alert.

Before

<div class="uper">
  @if(session()->get('success'))
    <div class="alert alert-success">
      <button type="button" class="close" 
        data-  dismiss="alert" aria-label="Close">
        <span aria-hidden="true">&times;</span>
      </button>
      {{ session()->get('success') }}
    </div><br/>
  @endif
</div>

After

<div class="uper">
  @if(session('message'))
    <div class="alert alert-{{ session('message')[0] }}" >
      <button type="button" class="close" data-dismiss="alert" aria-label="Close">
        <span aria-hidden="true">&times;</span>
      </button>
      {{ session('message')[1] }}
    </div>
  @endif
</div>

Usage:

return redirect('/')
  ->with('message', ['danger', 'You are not an authorized user!']);

Message_Bar_danger

The session key is set to ‘message’ and the value is an array which contains ‘message type’ and ‘message content’.

That’s all!

Thursday, February 21, 2019

Create A Middleware to Have The Admin Check in Laravel

Create A Middleware to Have The Admin Check in Laravel

In the previous post “Adding isAdmin() function in Model User in Laravel”, we create an isAdmin function to check the user’s authority in view files. However, we still need a mechanism to check admin authority in the controller file. In Laravel, on of the checking mechanism is “middleware”. It is specified in the controller’s route to prevent unauthorized requests before controllers.

For this case, we need to create an IsAdmin middleware file first at app/Http/Middleware/.

1. Create Middleware app/Http/Middleware/IsAdmin.php

Using artisan make command to create:

$ php artisan make:middleware IsAdmin

The middleware file app/Http/Middleware/IsAdmin.php has been created.

2. Add codes to the middleware file

Adding the checking codes:

<?php
namespace App\Http\Middleware;

use Closure;
use Illuminate\Support\Facades\Auth;

class IsAdmin
{
  /**
   * Handle an incoming request.
   *
   * @param  \Illuminate\Http\Request  $request
   * @param  \Closure  $next
   * @return mixed
   */
  public function handle($request, Closure $next)
  {
    if (Auth::check() && Auth::user()->isAdmin()) {
      return $next($request); 
    } else {
      return redirect('/');
    }
  }
}

3. Register the middleware IsAdmin.

The next step is to register IsAdmin in the protected function $routeMiddleware of app/Http/kernel.php .

Add the following codes:

'is_admin' => \App\Http\Middleware\IsAdmin::class,

to app/Http/kernel.php:

protected $routeMiddleware = [
  'auth' => \App\Http\Middleware\Authenticate::class,
    :
  'is_admin' => \App\Http\Middleware\IsAdmin::class,              
];

4. Add the middleware before routes that needed to be authorized.

For example, we can add middleware is_admin to the route name products.create:

(before)

route::get('products/create','ProductController@create')
  ->name('products.create');

(after)

route::get('products/create','ProductController@create')
  ->middleware('is_admin')
  ->name('products.create');

Thus, the user must be an administrator to have the right to create a new product.

5. Note: middleware in controller

What if the routes using resources keywords to generate Restful routes and we need to apply middleware to all routes except two of them? (i.e. index and show).

We use the ProductController as an example:

routes/web.php

Route::resource('products', 'ProductController');

There are routes generated by resources:

Method    | URI                     | Route Name      |
-------------------------------------------------------
POST      | products                | products.store  |
GET|HEAD  | products                | products.index  |
GET|HEAD  | products/create         | products.create |
DELETE    | products/{product}      | products.destroy|
PUT|PATCH | products/{product}      | products.update |
GET|HEAD  | products/{product}      | products.show   |
GET|HEAD  | products/{product}/edit | products.edit   |

These routes must apply middleware is_admin except “products.index” and “products.show”. In another word, These routes including “products.store”, “products.create”, “products.destroy”, “products.update” and “products.edit” are allowed by administrator only.

The solution is to put the middleware setting in the app/Http/Controller/ProductController.php to achieve the goal. By adding codes as follows:

public function __construct() {
  $this->middleware('is_admin')->only(['create', 'store', 'edit', 'update', 'destroy']);
}

Note: another keyword is except to exclude the middleware rule.

Adding isAdmin() function in Model User in Laravel

Adding isAdmin() function in Model User in Laravel

It is necessary to create a helper to identify whether the login user is an administrator. To do that, we can add a helper function to Model User.

app\User.php

public function isAdmin() {
  return $this->is_admin == true;
}

By checking the field is_admin, we can get the answer.

Thus, the isAdmin() function can be used by index.blade.php for showing the functions that only available for the administrator, such as “Add New Product”, “Edit Product” and “Delete Product”.

index.blade.php

<!-- Check if user is an administrator  -->   
@if(Auth::check() and (Auth::user()->isAdmin() == true))  
  <td><a href="{{ route('products.edit', $product->id) }}" 
  	class="btn btn-secondary">
  	<i class="fa fa-edit"></i>Edit</a></td>
  <td>
    <form method="post" action="{{ route('products.destroy', $product->id) }}">
  	  @method('DELETE')
  	  @csrf
  	  <button type="submit" class="btn btn-danger">
  	  <i class="fa fa-trash"></i>Delete</button>
  	</form>	
  </td>
@endif

Note that Auth::user()->isAdmin() may return null if the user is not login and it will make mistake. Therefor, we must check if the user is a login user by using Auth::check().

@if(Auth::check() and (Auth::user()->isAdmin() == true))
   :
@endif 

The isAdmin() function can be used to check if a login user is an administrator. It keeps guests and unauthorized users out of the functions only available for administrators in view files.

Friday, February 15, 2019

How to Pass Variables to View in Laravel

How to Pass Variables to View in Laravel

How to pass variables to view in Laravel? It’s quite easy.

1. with(‘xxx’, $xxx)

In controller:

$name    = "Tom";
$address = "XXX Rd.";
   :
Return view('name')->with('name', $name)->with('address', $address);

In view:

{{ $name }}

2. Pack all variables into an array

In controller:

$user = [
  $name    => "Tom";
  $address => "XXX Rd.";
]

return view('products.cart', $user);

In view:

{{ $name }}

3. compact

Using compact is a more concise and recommending way to do so.

In controller:

$cart  = session()->get('cart');
$total = 0;
   :
return view('products.cart', compact('cart', 'total')); 

In view:

{{ $cart }}
{{ $total }}

Monday, February 11, 2019

Create and Maintain Users with Artisan Tinker in Laravel

Create and Maintain Users with Artisan Tinker in Laravel

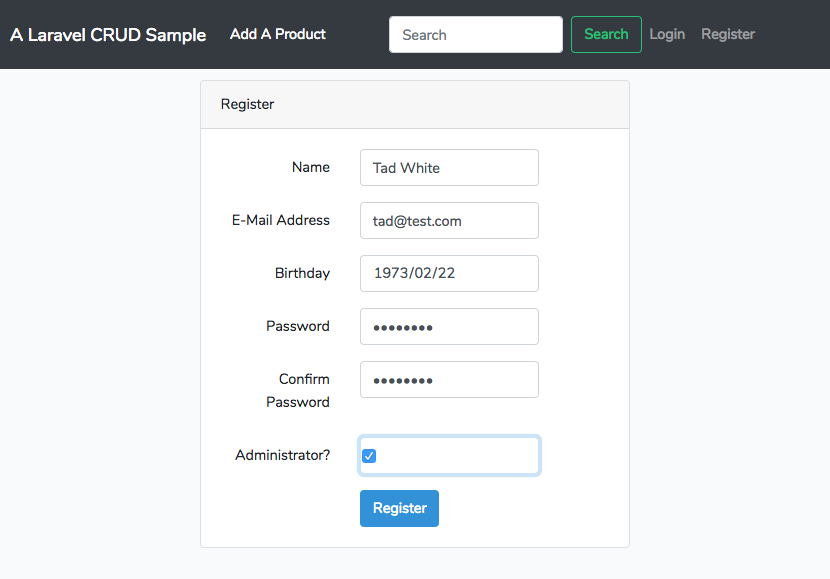
Now, it’s time to create a user to the database. Of course, using register form we have just created to create a user is a standard process. By the way, it’s good to have the functionality test to the register form.

However, there is a way to create user without register form. It utilizes the ‘artisan tinker’ commands to do so. It’s quite easy and can be done before we create the register form.

> php artisan tinker

When execute the command above, the Psy Shell shows and we can type the tinker commands to it.

Create a user

>>> $user = User::create(array('name' => 'Tad White', 
    'email' => 'tad@test.com', 
    'password' => Hash::make('xxxxxxxx')));
=> App\User {#2941
     name: "Tad White",
     email: "tad@test.com",
     updated_at: "2019-02-10 16:08:24",
     created_at: "2019-02-10 16:08:24",
     id: 1,
   }
>>>

or

>>> $user = new User;
=> App\User {#2938}
>>> $user->name = 'a';
=> "a"
>>> $user->email = 'a@test.com';
=> "a@test.com"
>>> $user->password = Hash::make('xxxxxxxx');
=> "$2y$10$E5ODjTvQefxCvMtm5S2xyuto9gqOtOJJRTNErUH9x6AtSnTPCPoki"
>>> $user->save();
=> true

Show all users

>>> User::all();
=> Illuminate\Database\Eloquent\Collection {#2943
     all: [
       App\User {#2940
         id: 1,
         name: "Tad White",
         email: "tad@test.com",
         email_verified_at: null,
         birthday: null,
         is_admin: 0,
         created_at: "2019-02-10 16:08:24",
         updated_at: "2019-02-10 16:08:24",
       },
       App\User {#2936
         id: 2,
         name: "a",
         email: "a@test.com",
         email_verified_at: null,
         birthday: null,
         is_admin: 0,
         created_at: "2019-02-10 16:14:02",
         updated_at: "2019-02-10 16:14:02",
       },
     ],
   }

Find the number of users

>>> User::count();
=> 2

Now, there are two users in the database.

Find a user

Let’s find the first user:

>>> User::find(1);
=> App\User {#2933
     id: 1,
     name: "Tad White",
     email: "tad@test.com",
     email_verified_at: null,
     birthday: null,
     is_admin: 0,
     created_at: "2019-02-10 16:08:24",
     updated_at: "2019-02-10 16:08:24",
   }

Or, we can do this to find the name includes ‘Tad’:

>>> User::where('name', 'like', '%Tad%')->get();
=> Illuminate\Database\Eloquent\Collection {#2913
     all: [
       App\User {#2944
         id: 1,
         name: "Tad White",
         email: "tad@test.com",
         email_verified_at: null,
         birthday: null,
         is_admin: 0,
         created_at: "2019-02-10 16:08:24",
         updated_at: "2019-02-10 16:08:24",
       },
     ],
   }
>>>

To find the name equal to ‘a’ and get all users:

>>> User::where('name', '=', 'a')->get();

or

>>> User::where('name', 'a')->get();

Using get() method to show all users from the query result set

To show the result set or collection that meets the condition, use 'get()' method:

>>> User::where('id', '>' , '2')->get();

Delete a user

> $user = User::find(1);
> $user->delete();

Create fake seed data

>>> factory(App\User::class, 10)->create();
=> Illuminate\Database\Eloquent\Collection {#2956
     all: [
       App\User {#2952
         name: "Abigail Fahey",
         email: "jaqueline.gusikowski@example.org",
         email_verified_at: Illuminate\Support\Carbon @1549816574 {#2951
           date: 2019-02-10 16:36:14.637540 UTC (+00:00),
         },
         updated_at: "2019-02-10 16:36:14",
         created_at: "2019-02-10 16:36:14",
         id: 3,
       },
       :

Sunday, February 10, 2019

Integrating The Default Authentication of Laravel with Current App

Integrating The Default Authentication of Laravel with Current App
The authentication is nearly necessary in every application. The Default Authentication in Laravel is simple to create yet powerful. It save a lot of time and effort of developers. It can be integrated into the current app with minor modifications.
Here are the key steps to do so:

1. Add two fields to users table

Let’s say there are table fields, ‘birthday’ and ‘is_admin’, need to be added to the table users. We can make a migration file first:
>php artisan make:migration add_fields_to_users_table --table=users
Created Migration: 2019_02_08_134603_add_fields_to_users_table
Secondly, we need to add codes to the migration file ‘2019_xx_xx_xxxxxx_add_fields_to_users_table.php’ under database/migrations directory.
public function up()
{
  Schema::table('users', function (Blueprint $table) {
  //
    $table->date('birthday')->nullable()->after('remember_token');
    $table->boolean('is_admin')->default(false)->after('birthday');
  });
}

public function down()
{
  Schema::table('users', function (Blueprint $table) {
  //
    $table->dropColumn('birthday');
    $table->dropColumn('is_admin');
  });
}
Thirdly, Execute php artisan migrate to add table fields to table users.
> php artisan migrate
Migrating: 2019_02_08_134603_add_fields_to_users_table
Migrated:  2019_02_08_134603_add_fields_to_users_table
Then we can make a commit to the git repository.
After executing php artisan make:auth and authentication file generation, a layout file has been generated:
resources/views/layouts/app.blade.php
This is the default layout page. It is shared by all Auth view file. We can find the code of ‘Login’ and ‘Register’ link in the file:
<!-- Authentication Links -->
@guest
  <li class="nav-item">
    <a class="nav-link" href="{{ route('login') }}">{{ __('Login') }}</a>
  </li>
  @if (Route::has('register'))
    <li class="nav-item">
      <a class="nav-link" href="{{ route('register') }}">{{ __('Register') }}</a>
    </li>
  @endif
@else
  <li class="nav-item dropdown">
    <a id="navbarDropdown" class="nav-link dropdown-toggle" href="#" role="button" data-toggle="dropdown" aria-haspopup="true" aria-expanded="false" v-pre>
      {{ Auth::user()->name }} <span class="caret"></span>
    </a>
    <div class="dropdown-menu dropdown-menu-right" aria-labelledby="navbarDropdown" 
      <a class="dropdown-item" href="{{ route('logout') }}" 
         onclick="event.preventDefault();document.getElementById('logout-form').submit();">
         {{ __('Logout') }}
      </a>
      <form id="logout-form" action="{{ route('logout') }}" method="POST" style="display: none;">
         @csrf
      </form>
    </div>
  </li>
@endguest
For the integration of all views ( current and Auth generated ), all we have to do is to:
  1. Copy the layout file we prefer to the directory resources/views/layouts/
  2. Rename it to app.blade.php. (rename original app.blade.php to other name first.)
  3. Insert the the code of ‘Login’ and ‘Register’ link above at the navbar position of the file.
  4. Update the @extends('layout') in all view file to @extends('layouts.app') to ensure all view files point to the same default layout file.
  5. The Auth view files are no need to changed.
enter image description here

3. Edit attributes of Model User

There are attributes ('birthday' and 'is_admin') of model User need to be added in app/User.php.
protected $fillable = [
   'name', 'email', 'password', 'birthday', 'is_admin'];

4. Modification of controller

For the controller, we need to add attributes 'birthday' and 'is_admin' to the file
App/Http/Controllers/Auth/RegisterController.php
protected function validator(array $data)
{
  return Validator::make($data, [
    'name' => ['required', 'string', 'max:255'],
    'email' => ['required', 'string', 'email', 'max:255', 'unique:users'],
    'password' => ['required', 'string', 'min:6', 'confirmed'],
    'birthday' => ['date','nullable'],
    'is_admin' => ['boolean'],
    ]);
}

protected function create(array $data)
{
  $is_admin = array_key_exists('is_admin', $data) ? true : false;
  return User::create([
    'name' => $data['name'],
    'email' => $data['email'],
    'password' => Hash::make($data['password']),
    'birthday' => $data['birthday'],
    'is_admin' => $is_admin',
  ]);
}

5. Add the fields to the view file

Now, 'birthday'and 'is_admin' have to be added to the user register page at resources/views/auth/register.blade.php
For 'birthday':
<div class="form-group row">
  <label for="birthday" class="col-md-4 col-form-label text-md-right">{{ __('Birthday') }}</label>
  <div class="col-md-6">
    <input id="birthday" type="date" class="form-control{{ $errors->has('birthday') ? ' is-invalid' : '' }}" 
      name="birthday" value="{{ old('birthday') }}">
    
    @if ($errors->has('birthday'))
      <span class="invalid-feedback" role="alert">
        <strong>{{ $errors->first('birthday') }}</strong>
      </span>
    @endif
  </div>
</div>
For ‘is_admin’:
<div class="form-group row">
  <label for="is_admin" class="col-md-4 col-form-label text-md-right">{{ __('Administrator?') } </label>
  <div class="col-md-6">
    <input id="is_admin" type="checkbox" class="
form-control{{ $errors->has('is_admin') ? ' 
is-invalid' : '' }}" name="is_admin" value="1">
    @if ($errors->has('is_admin'))
      <span class="invalid-feedback" role="alert">
        <strong>{{ $errors->first('is_admin') }}</
strong>
      </span>
    @endif
  </div>  
</div>
The register form is similar like:
enter image description here

6. Note: Checkbox Behavior

Unlike other input controls, a checkbox value is only included in the submitted data if the checkbox is currently checked. If it is, then the value of the checkbox’s valueattribute is reported as the input’s value.
If the checkbox is unchecked, both the key and value of the checkbox are NOT submitted. It submits nothing.
Therefore, the value of the checkbox ‘is_admin’ is set to ‘1’ for representing ‘true’ boolean value. It will be validated by the validator of RegisterController when submitted.
'is_admin'  =>  ['boolean']
Then in the create function of the RegisterController, the 'is_admin' key is checked whether it exists in the array $data . If does, it means the 'is_admin' is true, otherwise false.
$is_admin = array_key_exists('is_admin', $data) ? true : false;
return User::create([
    'name' => $data['name'],
    'email' => $data['email'],
    'password' => Hash::make($data['password']),
    'birthday' => $data['birthday'],
    'is_admin' => $is_admin',